Last Updated on July 26, 2023 by My Back Kitchen
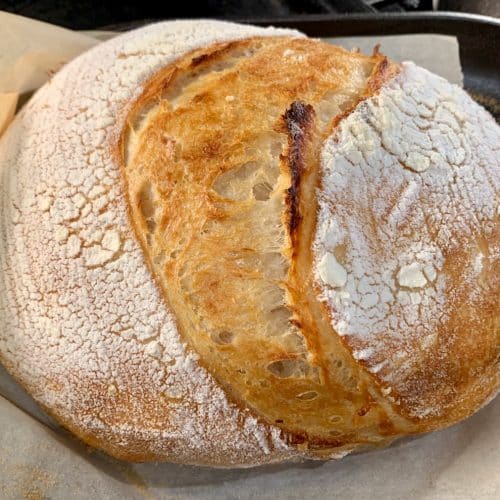
There’s something truly magical about the aroma of freshly baked bread wafting through your home. And when it comes to achieving a crusty exterior and a soft, tender interior, nothing beats the charm of homemade Dutch oven bread. With its simple ingredients and rustic appeal, this bread captures the essence of artisanal baking.
Homemade Dutch oven bread is a rustic masterpiece on its own, but you can take its presentation to the next level with these serving suggestions:
- Serve with butter and spreads: Slice the bread and serve it with a pat of butter or a variety of spreads such as flavored oils, herb-infused butter, or creamy cheese.
- Pair with soups and stews: The crusty exterior and soft interior of Dutch oven bread make it the perfect companion for hearty soups, stews, or even a simple bowl of spaghetti. The bread’s texture soaks up the flavors and adds a comforting element to your meal.
- Make sandwiches or toast: Use slices of your freshly baked bread to create delicious sandwiches or toast them for a delightful crunch. The bread’s rustic texture and flavorful crust provide an excellent base for both savory and sweet toppings.
- Share the joy: Dutch oven bread makes a heartfelt gift for friends and loved ones. Wrap a loaf in rustic paper or a tea towel, tied with a twine or ribbon, and offer it as a thoughtful homemade present.
Homemade Dutch oven bread is a rewarding baking project that brings warmth, comfort, and delicious aromas into your home. With its crispy crust and soft, chewy interior, this bread is a testament to the beauty of artisanal baking. So, roll up your sleeves, embrace the simplicity of the ingredients, and let your Dutch oven work its magic as you create your very own homemade bread masterpiece. Enjoy!
-MBK

Dutch Oven Bread
Ingredients
- 4 cups all-purpose flour
- 1 envelope active dry yeast
- 2 cups warm water
- 2 tsp. kosher salt
- 1 tsp. olive oil
Instructions
- Stir the yeast into the warm water and let sit until foamy.
- In a large bowl, mix together the flour and salt. Once incorporated, create a small well in the middle and pour in the water and yeast mixture.
- Mix by hand, until the water and flour comes together and forms a rough dough that pulls away from the sides of the bowl. Once the dough comes together, cover and let rise until doubled in size (about 1 ½-2 hours).
- Using a rubber spatula, work the dough loose from the sides and fold it up and over itself towards the center of the bowl. Turn the bowl 90 degrees, and repeat until all the dough has been pulled from the sides. Once finished, cover and let the dough rise again for another hour.
- Once the dough has doubled in size again, gently transfer it from the bowl to a lightly floured surface.
- Sprinkle a bit of flour on top of the dough. Using your hands, begin to shape it into a loaf. Fold the dough under itself several times to form a ball, then pinch together the seams of dough underneath.
- Place the dough seam-side down in a clean bowl that has been lightly coated with olive oil and dusted with flour. Cover and let rise for 1 hour.
- While the dough is doing its final rise, place a 6-quart Dutch oven (or heavy cooking pot with oven-safe lid) inside the oven and preheat the oven to 450˚F for 45 minutes. Carefully remove the pot from the oven and place on heat-safe surface. (Be careful! It’ll be VERY HOT.)
- Turn the proofed dough over onto a lightly floured surface and carefully place it inside the pot. Cover with the lid and return the pot to the oven. Bake for 45 minutes, removing the lid for the last 15 minutes.
- Remove bread from pot, cover with clean kitchen towel, and let cool for 10 minutes before slicing.